Showing posts with label nail art. Show all posts

Sunday, June 3, 2012

Black and Neon

So I've been in a nail slump lately nothing I tried I liked but these where a few that I actually did like! First I started with black nails then did the striping and dotting with white before putting the neon on top so that the design would stand out. The designs where just totally random and maybe that's what this look was not my favorite neon look I had this week.


Now it is super hard to take a picture of neon colors but just imagine all these colors as neons like highlighter colors! Because that's what color they where and they looked pretty darn cool! Now these where "ok" in my book but since I'm a little bit of a perfectionist when it comes to my nails I had to redo them. This is what I used.

China Glaze - In the Lime Light. China Glaze - Pink Voltage, Sinful Colors - Dream On, Milani - Dude Blue, Nina Ultra Pro - Solar Flare, Wet and Wild - Black Creme and FINALLY I topped it all off with Color Club - 0-60 Top Coat.

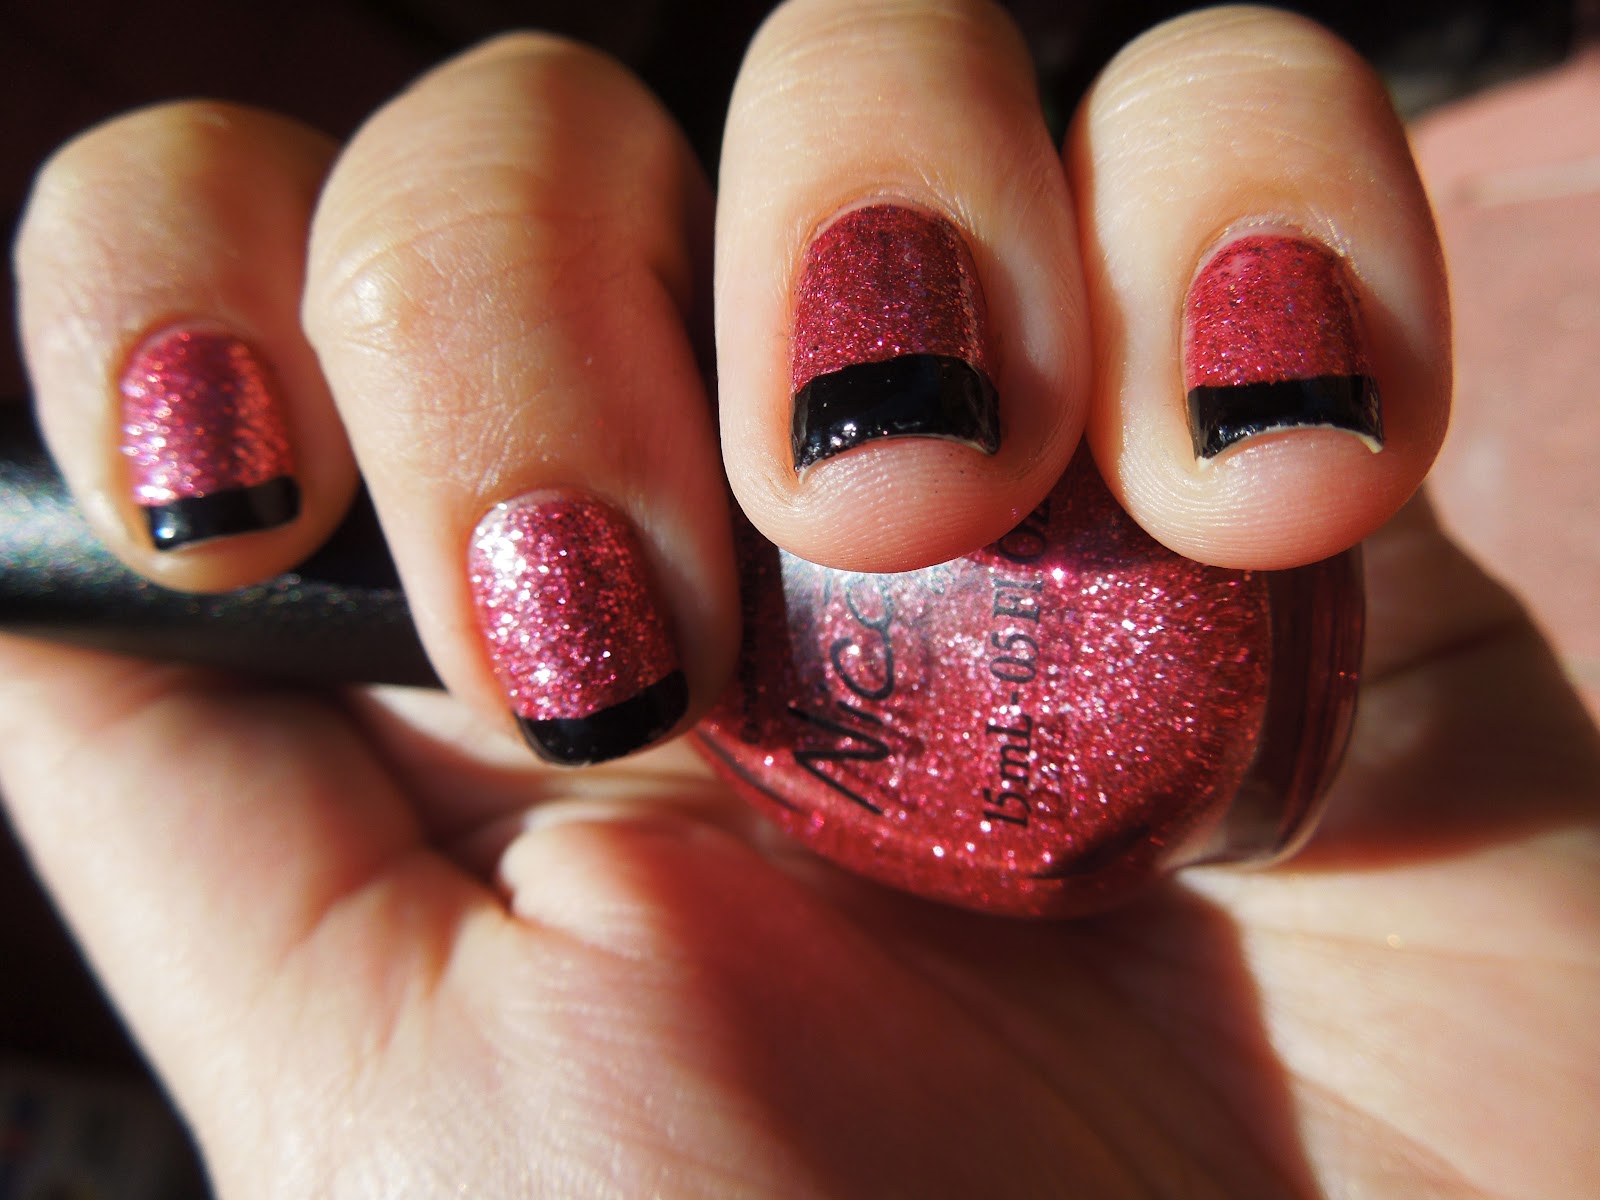
Ok so I didn't get a picture of this but I started painting all of my fingers a different color, since most of these colors are neons they all tool about 3+ coats. after they where all the way dry I used my stripping tape (which is pictured on the bottom of the polish pic) and put a piece across the tips of all my nails. I got my tape online somewhere because I've never been able to find it in any stores around me but you can used just regular scotch taped cut into strips if you want to you can ever cut the tape into funky waves or shapes to make the look even cooler. Ok so after applying the tape I painted my nails black let dry for just a few seconds and then ripped the tape off!


And tah dah! Perfect lines! Now this is the look I ended up sticking with until I had to work and it ruined them :( Stupid work! But anywhoo this is my summer black and neon look and they are oh so cool! lol

As always thank you for reading!!


Friday, May 25, 2012

Cherry blossoms

This is one of my favorite nail designs, and I totally winged it so I'm pretty proud of it. :)


They're not actually even on my nails- a friend requested I do some flowers on her nails. Fara and I went through some different designs on Pinterest and settled on a pretty cherry blossom design. We changed around the colors and like I said - I just winged it.

It's all free-handed. The black branches are done with a striper brush, the black and green dots are done with a ball-point pen dipped in polish. The dark pink flowers are down with a regular paintbrush.

Unfortunately, I never took the rest of the photos I took of this mani off my iPhone, and my phone was recently stolen. :( So this is the only photo I have of it. Here is a close-up of the design on the thumb.

Light pink: Sally Hansen's Diamond Strength Passion Flower
Dark pink: NYC's Greenwich Village
Green: NYC's Big Money Frost
Black: So Easy Stripe Rite in Blackest Black
Base and top coat: Revlon Multi-Care 965


Saturday, May 19, 2012

Flower paisley stamping

As I mentioned before, I bought a new Konad stamper and some plates recently. I've mostly just played around with stamping small designs and tip designs, until now. I tried a full-cover nail art stamp and I adore it.
I used a flowers and paisley design, it's cute and feminine.
Here is a closer view of the design.
I was originally going for a lighter pink base so that the white wouldn't stand out nearly as much, but I just couldn't resist trying it on top of a matted color. I do have a clear polish that will turn any color into matte, but I didn't want to layer too much.


I chose not to use a top coat in order to preserve the matted look.

Pink base: Sinful Colors Professional Matte Collection's Dream On
White: Konad Special Polish in white
Design: Konad image plate M64

Thursday, May 17, 2012

Colorful Zebra French

So I'm now realizing that I seem to like doing different styles of a French Manicure. This one is one of the coolest so far!


Because I am a Pinterest-aholic I found these on Pintrest and put my own twist on them by switching up the colors.


I used a base coat of Sally Hansen Smooth and Perfect - Linen. Then I did my french tips using Wet n Wild Megalast - I need a refresh-mint which is one of my newest colors and is absolutely awesome and I did my accent nail in Nina Ultra Pro - Pink Flamingo which in a great pink color. After everything dried I did the zebra stripes using a Color Club striper in the color Black. BTW the day I bought the Wet n Wild color I also bought a few Color Club stripers from Sally's and they are the best I've used yet! Nice thin polish to get the lines you want but also the colors show up really nice I will definitely be picking up more of these next time I go in because I have a coupon!! :)


I love these nails and I hope you do too! They are colorful and exotic and I just love them! I hope you like these as much as I do! Thanks for reading!


:)
 Kristy

Tuesday, May 15, 2012

Florida Sunset Nails

I wasn't quite sure what to do to my nails but I know I wanted to use the color orange because that is my mom's favorite color and I was going to have these nails on for mother's day. I picked out a few colors that I thought went with the orange and I decided they looked like a Florida sunset and that is what I decided to do!


They turned out better then I even expected! And I got TONS of compliments on them! This is how I did it.


I used 3 colors for the sunset part the orange is Nina's Ultra Pro - Orange Flame, the pink is a Cosmetic Arts color but the sticker fell off so i don't know the name but its a Neon Pink and the purple is Orly - Close Your Eyes. I started with my normal Nail Life base coat and finished with Seche Vite top coat to make it extra shiny. To start this look you need one of those white makeup sponges, you can get them at the dollar store they are super cheap!


You have to paint the colors in the order you want directly on to the sponge. It works best when you get the sponge wet and then ring out as much water as possible because it stays a little damp and doesn't suck up as much nail polish.


I tested mine out on a piece of paper first just to make sure that it looked like i wanted it to. After you get it looking like you want then instead of stamping on the paper you stamp it on your nails.


I'm not gonna lie it makes a MESS!!! I definitely should have taped off my nails first so that there wasn't so much clean up.


I used an angled brush that you can get from any arts and crafts store and dipped it into pure acetone to clean up my cuticles. I also used a Qtip and some cotton pads for the bugger mess. Oh and I've used just a regular flat brush to clean up my cuticles but an angled one works SOOOOO much better!


This was the after math of my nails I made a bit of a mess lol


I love these nails and my mom did too!! As always thanks for reading and I hope I added a little inspiration to your day!

:)
  Kristy


Wednesday, May 9, 2012

Red French with a bow!

I know I say all of my nail designs are my absolute favorite but these are at the top of the list as of right now! They're a mix of the classic french manicure with a little color and sparkle!


See aren't they just awesome?!? Well I love them and this is how I did it!


First as always I started with a base coat, I used Nail Life Nail Revitalizer in original as I usually do. Then I started with a 2 coats of Sally Hansen's Smooth and Perfect - 02 Linen.


After that dried completely I used scotch tape to make the red french tip. Normally I use french tip stickers I think from Sally Hansen to make my french line but I just haven't been able to find them in stores lately. A Good tip for using tape is to first stick it to your hand first to remove some of the stickiness so that it doesn't rip off your nail polish that you already have on. I've learned this the hard way!  I used Sinful Colors - Ruby Ruby for the red tips.


After my tips where done I added a line of black to them to make them stand out a little I used a stripping brush that I got from an old bottle of polish that I didn't use any more that I just cleaned off with acetone. The black was Sally Hansen Xtreme Wear - 28 Black Out


Then the bow on my thumb which made me just fall in love with them as soon as I added the bow! it was easy to do just two little triangles and I used a little crystal rhinestone for the center of the bow I topped the whole thing off with a Seche Vite top coat just to really make it shine!


I hope you love these as much as I do! and I hope I added a little inspiration to your life :) Thanks for reading!

:)
  Kristy


Monday, May 7, 2012

A few days of China Glaze - Blue Iguana

I was in a nail art slump I just didn't know what to do so I decided why not just a pretty color? I looked up on my wall rack and I picked a beautiful blue that I don't think I had ever used before.


I tried to take a good picture of it but i just couldn't capture the awesomeness of this color. The blue was such a perfect blue and the sparkle in it was so fine and so pretty I was obsessed  with this color! And I was so obsessed with this color I wanted to wear it longer then most of my other colors so after a few days I decided to jazz it up a little bit with some zebra stripes :)


I used my white Sinful Colors striper to make the stripes and just made a zebra pattern on them. These got noticed way more then the just plain blue did but I loved them both :)

Thanks for reading!

:)
 Kristy


Saturday, May 5, 2012

Fifty Shades of Grey inspired nails

I am SO excited to share this manicure with you!

Chances are, unless you live under a rock, you've at least heard of Fifty Shades of Grey, if you haven't already read it, that is. I read the first book and I'm currently on the second book, Fifty Shades Darker.

Like so many other things Christian Grey inspires (um, yum!), he also inspired my latest mani!
I only have one grey color in my polish collection, so after a base coat of the grey, I mixed some grey with black and made a darker grey. [A darker Grey... is that possible? ;)]

Thinking it needed a little more seductiveness to accurately portray Fifty Shades, I added a line of glitter between to the two shades.

I also wanted to represent a little bit of Christian personally by incorporating a bit of his Red Room...er, playroom. On my left thumb, I used a deep red instead of a darker shade of grey. On top of the basic design, I painted a dark grey necktie.
I'm usually not a huge fan of NYC colors, but I just thought this color red was the most appropriate for the design. Deep, ruby-red. I sealed it with a top coat to prevent chipping, which often happens with NYC colors.

I have to admit, I'm a bit in love with this mani. It's sultry, sexy, chic.


Grey: New York Color's Sidewalkers
Dark grey: mix of New York Color's Sidewalkers and Sinful Color's Black on Black
Silver: Milani Nail Art's Art of Silver
Red: New York Color's i211A
Top Coat: Revlon Base+Top Coat 965

What would you do for a Fifty Shades of Grey inspired manicure?

<3, Cassie

Friday, May 4, 2012

My first Kardashian color

So normally I don't buy Nicole by O.P.I. colors, actually I don't think I had any before a few days ago, but I do love some of the Kardashian colors I normally just can't get my self to pay so much for something that is just normal colors for me. BUT I was out the other day have a "Kristy Day" all to myself and I came across some Kardashian colors that where on sale so I decided why the heck not? lol So I picked out Wear Something Spar-Kylie and I"m not gonna lie its a pretty awesome color!


I added the black tips for just a little bit of color? I guess you wouldn't say color because I don't think black is a color or is it? IDK but anyways I used Sinful Colors Black on Black to add the black tip that I free handed because I couldn't find my little french nail stickers. Please ignore the tips in this first picture I had been wearing them for a few days when I took this.


I was actually Kinda of impressed about how nicely this polish went on. I only needed 2 coats of it when most glitters need tons and tons to make it look good. I'm not positive if I will be buying any more Nicole by O.P.I. colors any time soon but I will be loving me some sparkles since I found a new easier way to take it off my nails :)

Thanks for reading!

:)
Kristy

Wednesday, May 2, 2012

Art in Motion ?

I was in Walmart the other day looking through the nail polish trying to decide if I really needed another bright pink or not and a new display caught my eye. This polish is called art in motion and it's supposed to be "magic." I was a little skeptical but I bought it any ways :)


\This is how the polishes came, you get one "magic base coat" which is the white color and then you get the black one which is supposed to turn bright blue, like the label in the front, when you put it on top of the white. It also came with a little emery board that looked like a record but I didn't use it. Ok so what you do is paint your nails in the white base coat and let them dry then you paint on a coat of the black color and it is supposed to turn blue and make a design as it dries which it why its called "Art in Motion"
This is what It turned out like. I guess I didn't realize it was just going to be a crackle but it was really cool that the black changed to light blue I'm still not positive how they got it to do that. I ended up putting putting this on my toes because I already had my nails done. its actually one of the cooler crackles that I have :)


I've never taken a picture on my toes before they kinda look funny lol I do love my crackle polish on them tho :) I would definitely suggest picking up a bottle of this polish its pretty and I think only about $5 for the 2 bottles, they also had other colors pink purple yellow and green I think. Worth it if you like crackles!

As always thanks for reading! If you have and requests or suggestions please let me know!

:)
Kristy