

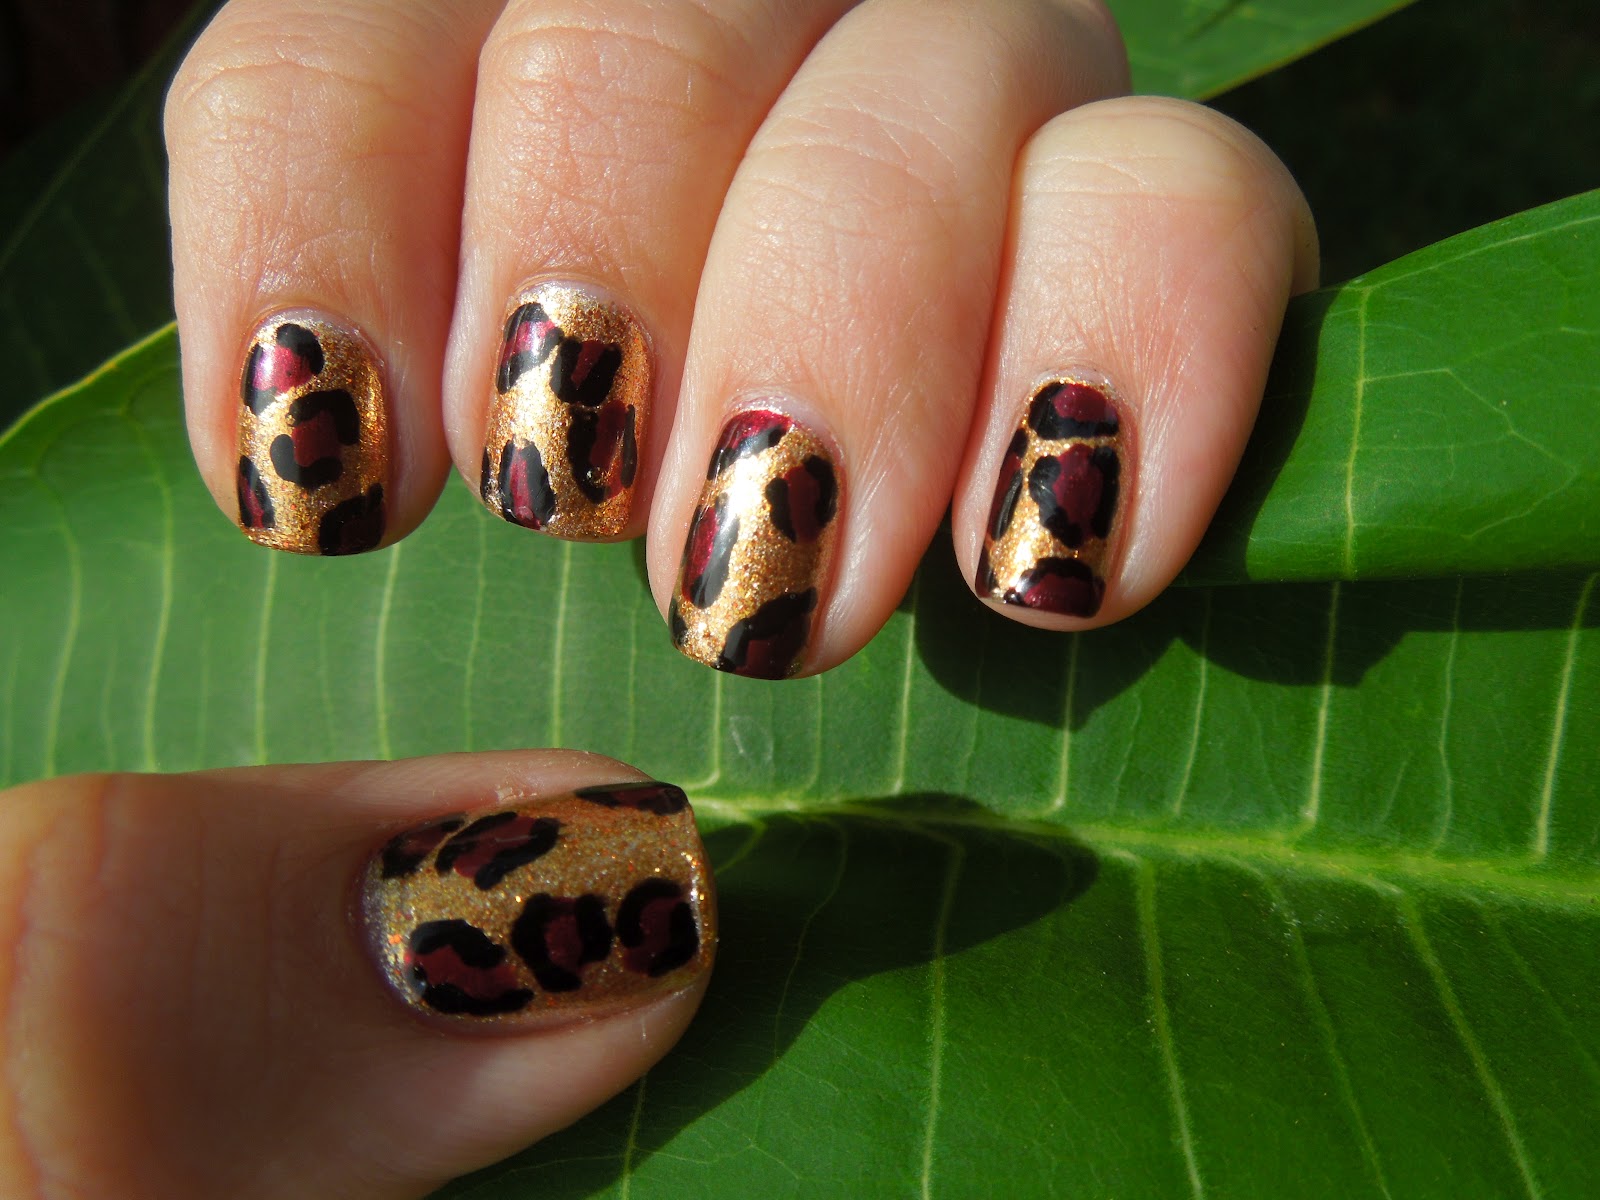
OK first of course start with your favorite base coat and as you all learned in my last post Seche Vite Rebuild is my absolute favorite. After that I Painted one coat of Nina Ultra Pro - Big Spender, and on top of that I used two coats of Sinful Colors - All About You. For the inside of the dots I used China Glaze - Heart of Africa and for the outside of the dots Wet and Wild - Black Creme.

This is what my base color looked like. I actually had to shop around a little bit and experiment to get this really pretty orangey gold color but it turned out really nice.

First step in the leopard spots is to use a tooth pick or a dotting tool to make little blobs all over your nails. The trick is actually to not be perfect it the blobs are too uniform then it won't look like real leopard spots. It will look too forced and that's the problem I had with my spots for a long time.

Second and last painting step, after you make your inside blobs you have to make little C like shapes around them. Just like the blobs these can't be perfect or they won't look right. And I suggest not using a striper to do these or else your lines are too straight and end up looking like my Fred Flinstone nails. I used a dotting tool but you can very easily use a tooth pick to get this look as well.

Last step is to clean up your edges and apply your top coat which ever one you want. :) I always used my favorite Seche Vite because I think it gives off the most shine. But sometimes I have a problem with shrinking when I use it.

Thank you so much for reading and I hope I put a little inspiration into your day!
:)


No comments:
Post a Comment