Showing posts with label tutorial. Show all posts

Wednesday, June 6, 2012

How to Fix a Torn Nail

Ok imagine this...
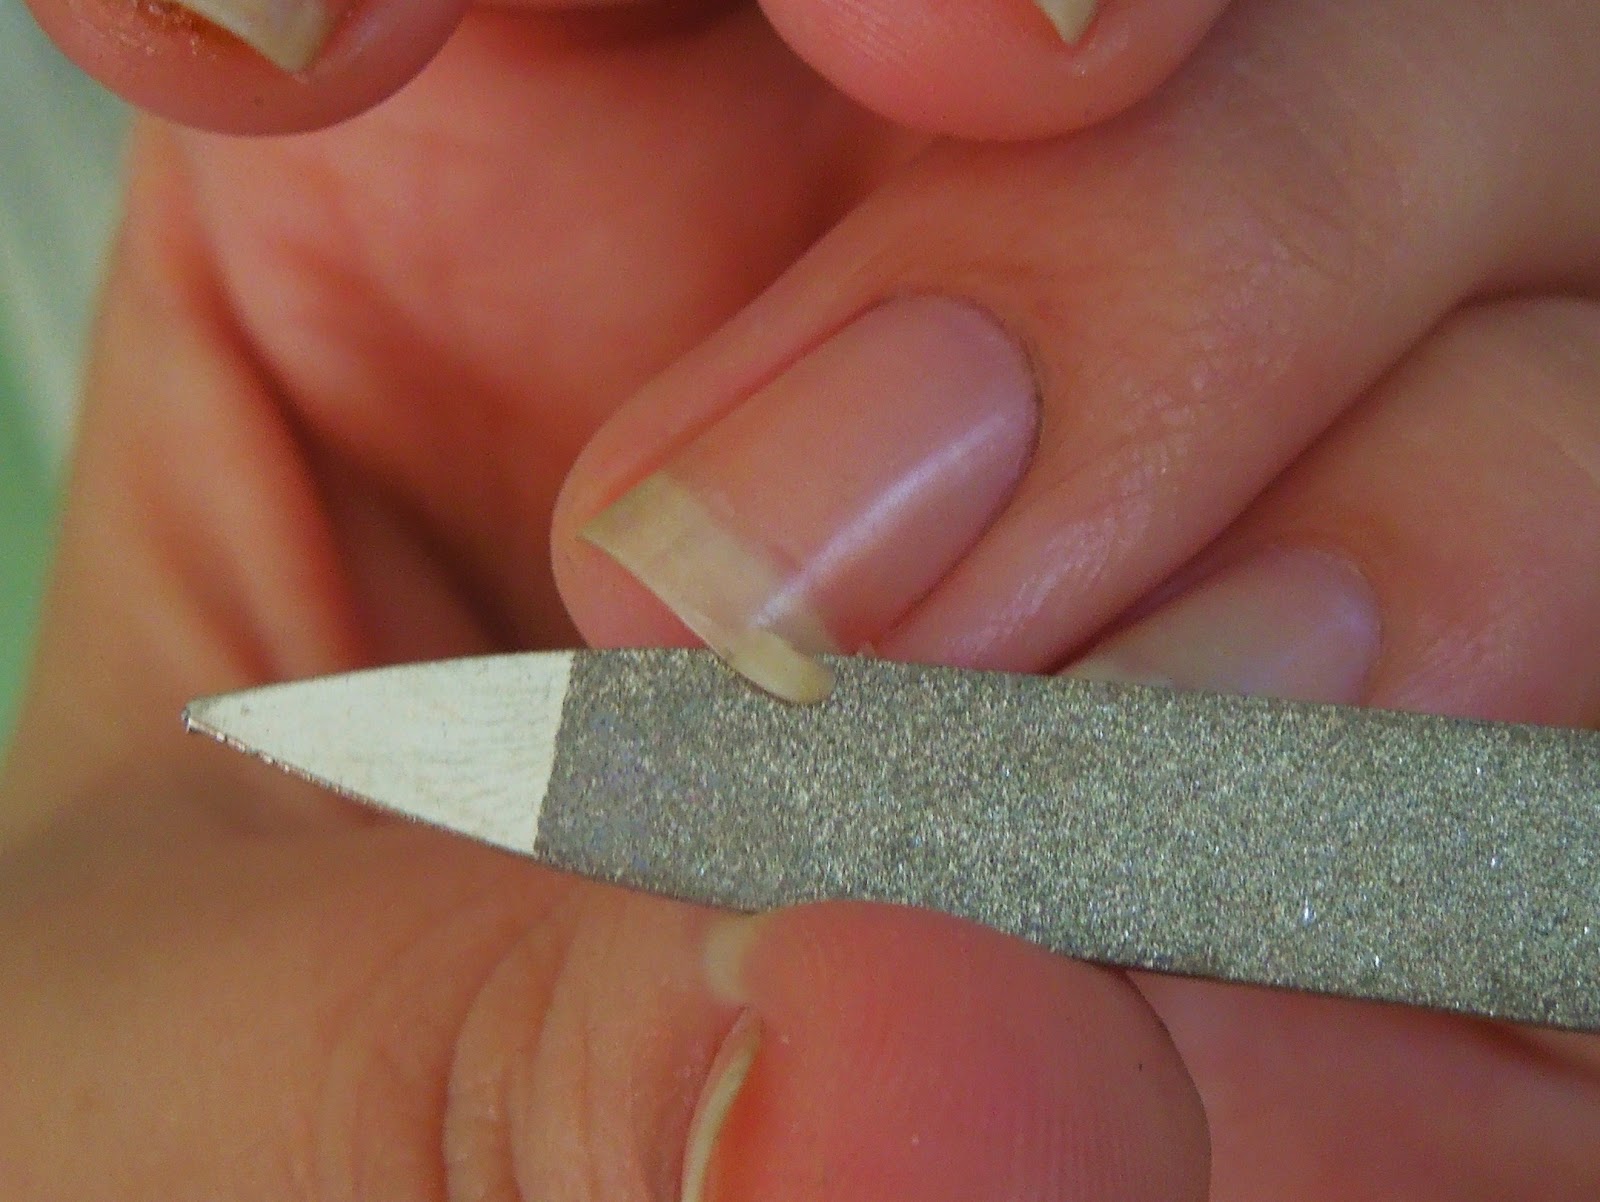
      Your nails look beautiful they are just getting to the point where they are long enough to do some really cool designs with, they are all the same shape and size. And then it happens!! The dreaded break the one that happens right at begining of the nail and you have to cut it down to a nub and look lop sided for weeks until it grows out...


Scary huh? Well you don't have to suffer with nubs anymore! I'm gonna tell you the trick to fixing your torn nail. I have 2 different ways to do this and you can do either depending on what you have on had and if you can make it to the store or not.


The first way is to go to Sally's or your local beauty supply store and pick up a nail repair kit. In this tutorial I'm using Orly's nail repair kit. The kit comes with 3 things nail repair powder, a little buffer and a bottle of nail glue.

The first thing you have to do is to make sure your torn nail is clean and free of any nail polish. Be careful not to rip the nail any more then it already is. After you do this you paint over the crack in your nail with the nail glue and let it sit for just a second until its tacky and then dip your nail into the nail repair poweder.


When you take your nail out of the powder brush off the access and let it dry COMPLETELY! I can't stress that part enough because if you don't let it dry then the whole thing gets ruined and most of the time I just had to end up cutting my nail.


After it has dried all the way it will be hard and all you had to do is buff it smooth with the buffer that came with it or one of your own. I used my own because the one that came with it was too little to control for me.


You can still kind of tell where the rip was but ts patched all up now and as soon as you put polish on top of it you can't even tell there was even a problem!

The second way to patch a broken nail is for all you hot tea drinkers our there. The first step is the same make sure the nail is free of all polish and dirt. Then take a hot tea bag and empty out all of the tea. After its all cleaned out cut a patch out of the bag about the size of your tear in your nail. Then using nail glue of super glue (both work just as good as the other one) glue the patch on to the tear. Again let it dry all the way before buffing it out smooth.


Both ways work just as good and as long as you don't mess with it the patches will last unti the next time you use polish remover to take off your polish or until the nail grows back. Which ever comes first lol with me its always until I use remover again.


As always thanks for reading and I hope you learned something new!
:)


Sunday, June 3, 2012

Black and Neon

So I've been in a nail slump lately nothing I tried I liked but these where a few that I actually did like! First I started with black nails then did the striping and dotting with white before putting the neon on top so that the design would stand out. The designs where just totally random and maybe that's what this look was not my favorite neon look I had this week.


Now it is super hard to take a picture of neon colors but just imagine all these colors as neons like highlighter colors! Because that's what color they where and they looked pretty darn cool! Now these where "ok" in my book but since I'm a little bit of a perfectionist when it comes to my nails I had to redo them. This is what I used.

China Glaze - In the Lime Light. China Glaze - Pink Voltage, Sinful Colors - Dream On, Milani - Dude Blue, Nina Ultra Pro - Solar Flare, Wet and Wild - Black Creme and FINALLY I topped it all off with Color Club - 0-60 Top Coat.

Ok so I didn't get a picture of this but I started painting all of my fingers a different color, since most of these colors are neons they all tool about 3+ coats. after they where all the way dry I used my stripping tape (which is pictured on the bottom of the polish pic) and put a piece across the tips of all my nails. I got my tape online somewhere because I've never been able to find it in any stores around me but you can used just regular scotch taped cut into strips if you want to you can ever cut the tape into funky waves or shapes to make the look even cooler. Ok so after applying the tape I painted my nails black let dry for just a few seconds and then ripped the tape off!


And tah dah! Perfect lines! Now this is the look I ended up sticking with until I had to work and it ruined them :( Stupid work! But anywhoo this is my summer black and neon look and they are oh so cool! lol

As always thank you for reading!!


Friday, June 1, 2012

Blue to pink gradient

I love this gorgeous gradient design. And I created it differently than I've ever made gradients before. This time, I used a fan nail art brush. It was *very* easy and it looks fantastic.

Instead of the hassle of sponging or the difficulty of blending with regular brushes, using a fan brush allowed me one stroke per nail to make this design. Yes, just one stroke! wow!

This is the brush I used. It is called a fan brush and it is part of a set of nail art brushes I bought from Amazon.de.


First, I practiced using the brush a bit, just to get the hang of it. I tend to practice brush strokes and make color dots on the back of tissue boxes. This is a very well-used tissue box, lol.


I played with a few color combinations before I settled on blue to purple to pink. I put color splashes of blue, purple and pink in that order one after another- close to each other but not touching.

I simply dragged the brush through the colors, pulling them downward. Then I dragged the brush from left to right across my nail. Simple as that! It does leave a good amount of polish all over your skin, though, so it requires a bit of clean up.


But, with some polish remover on q-tips for the big stains and an angled nail art brush dipped in polish remover for the cuticles, it looks perfect.
Add a top coat of Seche Vite for some shine and protection and you're done!


One of the best things about this mani is that it was just as easy to do on my right hand as it is on my left, which I know can be an issue for many DIY manicures.

Base coat: Revlon Multi Care 965
Blue: Sally Hansen Xtreme Wear Blue Me Away
Purple: Sally Hansen Xtreme Wear Deep Purple
Pink: Butter London's Primrose Hill Picnic
Top coat: Seche Vite


Tuesday, May 15, 2012

Florida Sunset Nails

I wasn't quite sure what to do to my nails but I know I wanted to use the color orange because that is my mom's favorite color and I was going to have these nails on for mother's day. I picked out a few colors that I thought went with the orange and I decided they looked like a Florida sunset and that is what I decided to do!


They turned out better then I even expected! And I got TONS of compliments on them! This is how I did it.


I used 3 colors for the sunset part the orange is Nina's Ultra Pro - Orange Flame, the pink is a Cosmetic Arts color but the sticker fell off so i don't know the name but its a Neon Pink and the purple is Orly - Close Your Eyes. I started with my normal Nail Life base coat and finished with Seche Vite top coat to make it extra shiny. To start this look you need one of those white makeup sponges, you can get them at the dollar store they are super cheap!


You have to paint the colors in the order you want directly on to the sponge. It works best when you get the sponge wet and then ring out as much water as possible because it stays a little damp and doesn't suck up as much nail polish.


I tested mine out on a piece of paper first just to make sure that it looked like i wanted it to. After you get it looking like you want then instead of stamping on the paper you stamp it on your nails.


I'm not gonna lie it makes a MESS!!! I definitely should have taped off my nails first so that there wasn't so much clean up.


I used an angled brush that you can get from any arts and crafts store and dipped it into pure acetone to clean up my cuticles. I also used a Qtip and some cotton pads for the bugger mess. Oh and I've used just a regular flat brush to clean up my cuticles but an angled one works SOOOOO much better!


This was the after math of my nails I made a bit of a mess lol


I love these nails and my mom did too!! As always thanks for reading and I hope I added a little inspiration to your day!

:)
  Kristy


Saturday, April 14, 2012

Fishtail braids

This morning I did a fishtail braid design on my nails! It was pretty simple and I love the colors I chose.
The only bad part of this manicure is that it layers... and layers... and layers. So parts of your nail have three layers of polish on it at a time. Takes a while to dry. It's the type of design I can only do on the weekends when my husband is available to pick up the baby when she cries. Because of this, I chose to forgo to the base coat and top coat.


Aaannd I put together Pretty in Polish's first tutorial!!

Would you try this design? What colors would you use?